How to Setup an Admin Page With MongoDB
The year is 2013 and you’re looking to start a new SaaS application. You’ve been following the latest trends and decide to go with The MEAN Stack: MongoDB, ExpressJS, AngularJS and Node.js. It won’t be until a few years later that you regret most of these decisions, before finally settling into the acceptance phase. Jokes aside, MongoDB has carved itself a spot as one of the top NoSQL databases and will be around for the forseeable future.
If you are using MongoDB, you are likely also using Robo 3T or MongoDB Compass to manage your data. This post describes how to quickly setup an admin page using the Django framework and djongo connector that makes it a breeze to view and modify data in your database.
What is Django?
From Django’s homepage: “Django is a high-level Python Web framework that encourages rapid development and clean, pragmatic design”. Better yet, run through their 7 part tutorial to see what it does and how it works (This is the best web framework tutorial I have been through).
While Django is primarily intended to be used as the framework for your entire backend, that doesn’t mean that’s how you must use it. In my case, I yearned for the admin site functionality that is built in to Django, but didn’t want to run the rest of my app there.
What’s so Great About the Django Admin Page?
From Django’s second tutorial:
Generating admin sites for your staff or clients to add, change, and delete content is tedious work that doesn’t require much creativity. For that reason, Django entirely automates creation of admin interfaces for models.
Django was written in a newsroom environment, with a very clear separation between “content publishers” and the “public” site. Site managers use the system to add news stories, events, sports scores, etc., and that content is displayed on the public site. Django solves the problem of creating a unified interface for site administrators to edit content.
The admin isn’t intended to be used by site visitors. It’s for site managers.

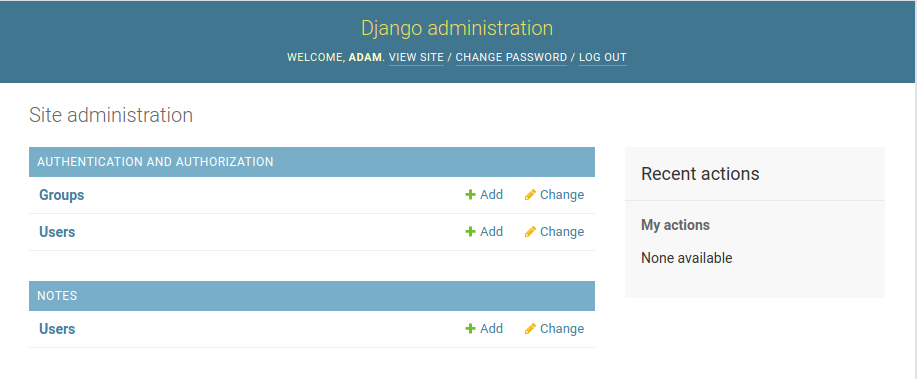
The Django admin site allows you to view and modify existing data without having to connect directly to your database. Admin users can be given different roles and permissions, allowing you to have different tiers of site management. The admin site also allows you to better view relational data by turning ids into links directly to that object within the admin site.
How to Setup Django with MongoDB (using Djongo)
Djongo is a custom database connector that allows connecting a MongoDB database as the database for your Django application.
- Install Django (preferably using venv)
pip install django - Install djongo
pip install djongo - Create Django Website
django-admin startproject mysite - Update settings.py
DATABASES = { 'default': { 'ENGINE': 'djongo', 'NAME': 'your-db-name', 'CLIENT': { 'host': 'your-db-host', } } } - Run Initial Migration
python manage.py migrate - Create Admin Super User
python manage.py createsuperuser - Run the sevelopment server
python manage.py runserver - Login to the admin page at
http://127.0.0.1:8000/using the credentials fromcreatesuperuser
This will create the required database collections to support the Django admin site. Because MongoDB is schemaless, this is the only time you need to run migrations when using Django with Djongo.
Setting Up Django Models and Admin
I created a separate app to host my models. You can do so with django-admin startapp appName.
Here is a simplified model for the users collection.
appName/models.py
from django.db import models
from djongo.models import ObjectIdField

class User(models.Model):
    # The ObjectIdField specifies a few important things
    # Without this, Django attempts to use an auto-incrementing id
    _id = ObjectIdField()

    # Other fields can be specified
    # See https://docs.djangoproject.com/en/3.2/ref/models/fields/
    # for full list of Fields
    username = models.CharField(max_length=60)

    # This points Django to the specific collection name it should use
    # Without this it will default to appName_users
    class Meta:
        db_table = "users"

    # This is a handy trick to get a more user friendly string
    # than the id to display in the admin pages
    def __str__(self):
        return self.username
appName/admin.py
from django.contrib import admin
from .models import Note, User
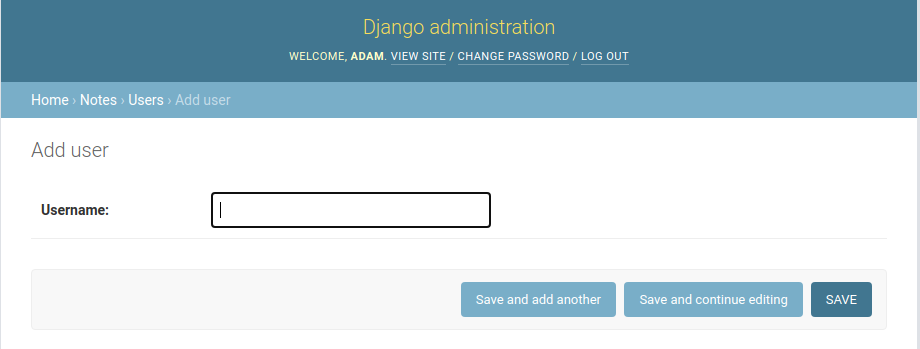
@admin.register(User)
class UserAdmin(admin.ModelAdmin):
# This is one of many customizations that can be made to change
# how this data displays in the admin page
list_display = ("_id", "username")
See final Django tutorial for more ways to customize the admin site
Advanced: How to Setup Django Admin on Separate Database
The above worked perfectly for my proof of concept. My final lingering concern was dumping about 11 new collections (to support the django admin site) into my existing production database. Below I will outline the steps to run the admin database separately while still maintaining access to models in your existing database.
Set Up Two Databases in settings.py
mysite/mysite/settings.py
DATABASES = {
    "default": {
        "ENGINE": "djongo",
        "NAME": "admin",
        "CLIENT": {
            "host": "localhost:27017",
        },
    },
    "appName": {
        "ENGINE": "djongo",
        "NAME": "appName",
        "CLIENT": {
            "host": "localhost:27017",
        },
    },
}
This will set admin as the default database that Django attempts to use. Without any other changes, everything will route to the default database. In order to route the app specific models to a different database we need to use a database router.
mysite/mysite/settings.py
DATABASE_ROUTERS = ["mysite.routers.DatabaseRouter"]
mysite/mysite/routers.py
from appName.models import User

models = [User]


class DatabaseRouter:
    def db_for_read(self, model, **hints):
        if model in models:
            return "appName"
        return None

    def db_for_write(self, model, **hints):
        if model in models:
            return "appName"
        return None
Full Source Code
View the full source code for how I have used this in engram
Alternatives
Admin Bro
In my initial quest to find a simple admin solution for MongoDB, I stumbled on Admin Bro. While I like that hooks directly into mongoose with an adapter, I found this to create more problems than it solved. I eventually got it working, but continued to stumble through documentation and found it not as intuitive as the Django admin. I’m heavily biased as I have used the Django admin before, so take this all with a grain of salt. If you are looking for a solution that doesn’t force you to bring another tech stack into your application, Admin Bro may be the solution you are looking for.